Setup
Step 1: Install Raspbian
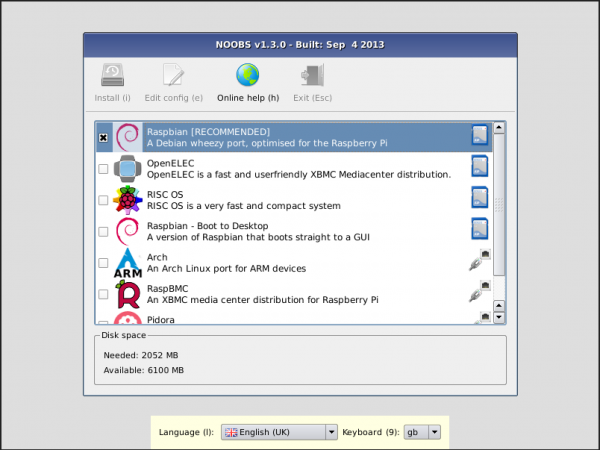
Use the official docs to help you install Raspbian. But it’s more than likely that your Pi already has a boot image on the SD card that came with it. So, power it up and see if you get something like below:
Step 2: Configure Raspbian
Once booted up and on the desktop of Raspbian, we need to set the Locale, Timezone, Keyboard and enable SSH.
- click on the Raspberry Pi menu icon
- Select Preferences, Raspberry Pi Configuration
- In the Raspberry Pi Configuration, on the Interfaces tab
- Next to SSH, select enable, click OK
- In Raspberry Pi Configuration, on the Localisation tab, click Set Locale
- Select the Language (eg en), Country (eg CA) and leave Character Set at UTF-8, click OK
- In Raspberry Pi Configuration, on the Localisation tab, click Set Timezone
- Select the Area (eg Canada), Location (eg Eastern), click OK
- In Raspberry Pi Configuration, on the Localisation tab, click Set Keyboard
- Select the Country, Variant and click OK
- In Raspberry Pi Configuration, click OK, and reboot
Step 2: Updates
In the terminal run the following commands, each one after the other has finished:
sudo apt-get update -ysudo apt-get upgrade -ysudo apt-get dist-upgrade -ysudo apt-get autoremove -y
Step 3: Dashboard Dependencies
In the terminal run the following commands, each one after the other has finished:
sudo apt-get install -y chromium-browsersudo apt-get install -y ttf-mscorefonts-installersudo apt-get install -y uncluttersudo apt-get install -y x11-xserver-utils
This will install everything you need to get a fullscreen dashboard running
Step 4: Boot Setup
We need to configure the PI to boot straight to the dashboard. You will need the IP of the server running the dashboard.
sudo vi .config/lxsession/LXDE-pi/autostart
Comment out the following line: (Put a # before it)
@xscreensaver -no-splash
Add the following to the bottom of the file: (replace http://192.168.0.1 with your server IP)
@/usr/bin/chromium-browser --incognito --start-maximized --kiosk http://192.168.0.1
@unclutter
@xset s off
@xset s noblank
@xset -dpms
Step 5: SSH
Open the terminal and find the Pi’s IP address: ifconfig. Make sure you are connected to your network first. Note down the IP.
Connect to your PI from another machine: (replace 192.168.0.10 with actual IP)
ssh pi@192.168.0.10
Most of the time the user is set to pi and the default password is raspberry. You will probably want to change this. You can do that with passwd.
Step 4: Reboot
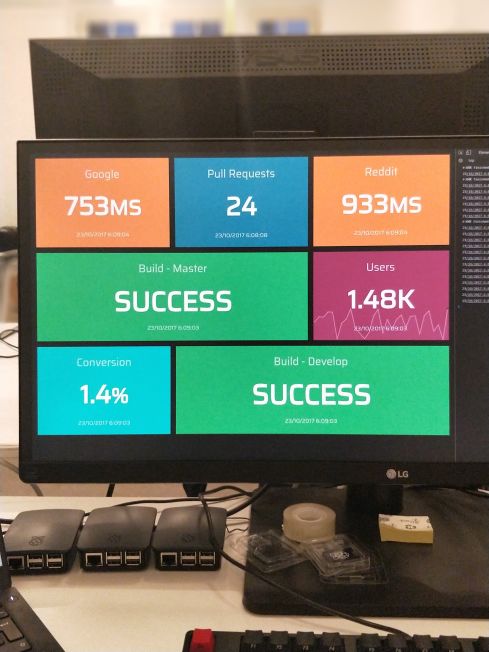
You should now be able to reboot the PI and watch it boot straight to a browser, go fullscreen and load your dashboard from your server. You can do the above for as many PI’s as you like.